Install OpenCV 4.2 with CUDA, Tesseract and opencv_contrib
- Nisal Panagoda
- Feb 8, 2020
- 1 min read
I'm building opencv from sources using CMake GUI mode and Visual Studio 2019 on Windows 10.
You must have Visual Studio 2019 and CMake installed.
Download and install NVidia Driver and NVidia Toolkit
To Install Tesseract I had to manually install dependencies Leptonica, zlib and and libpng. You may try step 9 and cmake will tell you if any dependencies required.
Download zlib here and extract.
Open CMake. CMAKE_INSTALL_PREFIX is the place where you want to install the libraby. We usually create a build directory for binaries.

6. When all set, Configure, Generate then Open Project. Visual Studio will pop up. Build Solution in Release configuration. Build INSTALL under CMake targets. Then CMAKE_INSTALL_PREFIX\bin\zlib.dll will be available. If you need Debug dll you have to rebuild in Debug configuration too.
7. Download libpng from here. Extract and CMake. Configure, Generate. Open Project. Build. Build INSTALL.

8. Download Leptonica from here. Extract and CMake. Configure, Generate. Open Project. Build. Build INSTALL.

9. Download Tesseract from here. Extract and CMake. Configure, Generate. Open Project. Build. Build INSTALL.

Liptonica_DIR must be set. If download timeout set INACTIVITY_TIMEOUT 120 in Line 43
<extract path>\tesseract-4.1.1\src\training\CMakeLists.txt
10. Download TBB from here. Extract. (Optional)
11. Download OpenCV sources from here. Download OpenCV Contrib (Extra Modules) sources from here. Open CMake and configure Tesseract as below

Configure TBB as below.

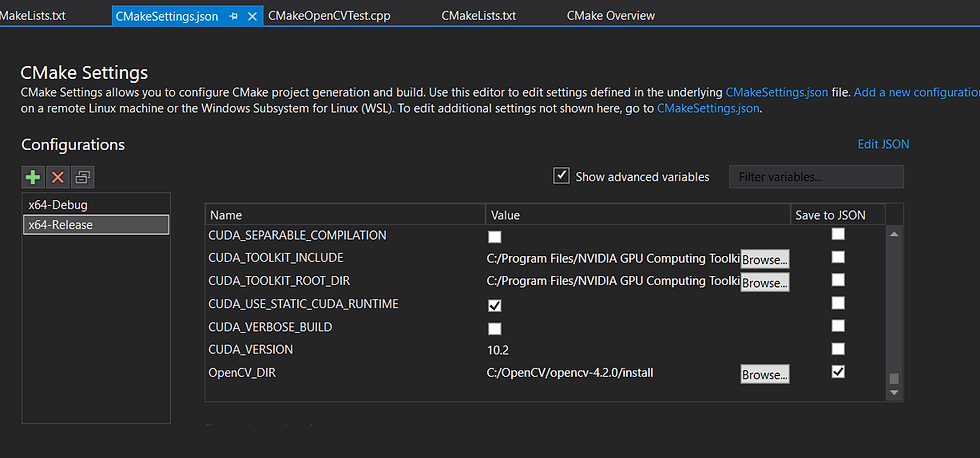
Configure CUDA as below.


Check WITH_CUDA, OPENCV_DNN_CUDA, CUDA_FAST_MATH, CUDA_ARCH_BIN,
CUDA_ARCH_PTX
OPENCV_EXTRA_MODULES_PATH <download path>/opencv_contrib-4.2.0/modules
12. Configure, Generate. Open Project. Build. Build INSTALL.
You are done. You'll get all opencv .dlls <CMAKE_INSTALL_PREFIX>\dll\vc16\bin.


Comments