Visual Studio 2019 CMake project with OpenCV
- Nisal Panagoda
- Feb 8, 2020
- 1 min read
File -> New -> Project -> CMake Project
Give a project name (CMakeOpenCVTest)
Open CMakeList.txt and edit as below
cmake_minimum_required (VERSION 3.8)
project ("CMakeOpenCVTest")
add_subdirectory ("CMakeOpenCVTest")
cmake_policy(SET CMP0079 NEW)
FIND_PACKAGE(OpenCV REQUIRED)
TARGET_LINK_LIBRARIES("CMakeOpenCVTest" ${OpenCV_LIBS})

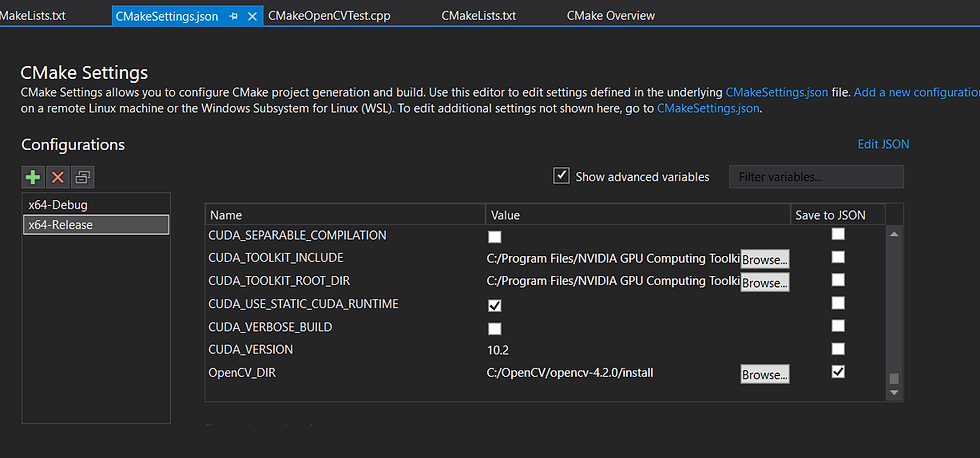
From tool bar click Manage Configurations from drop down (x64-Debug). Then CMakeSettings.json file will be created. Save it. Add x64-Release configuration if required. Note that opencv build configuration (Release) must match with cmake configuration (x64-Release)
Select the required configuration (x64-Release) in tool bar and set OpenCV_DIR to Opencv installed directory where OpenCVConfig.cmake exist
Done. Here is a code to test.
#include "CMakeOpenCVTest.h"
#include <opencv2/core.hpp>
#include <opencv2/highgui.hpp>
using namespace std;
using namespace cv;
int main()
{
cout << "Hello CMake OpenCV" << endl;
Mat img = imread("BingImageOfTheDay.jpg");
namedWindow("Display Image", WINDOW_AUTOSIZE);
imshow("Display Image", img);
waitKey(0);
return 0;
}


Comments